


A layered Italian affair
Hiya!
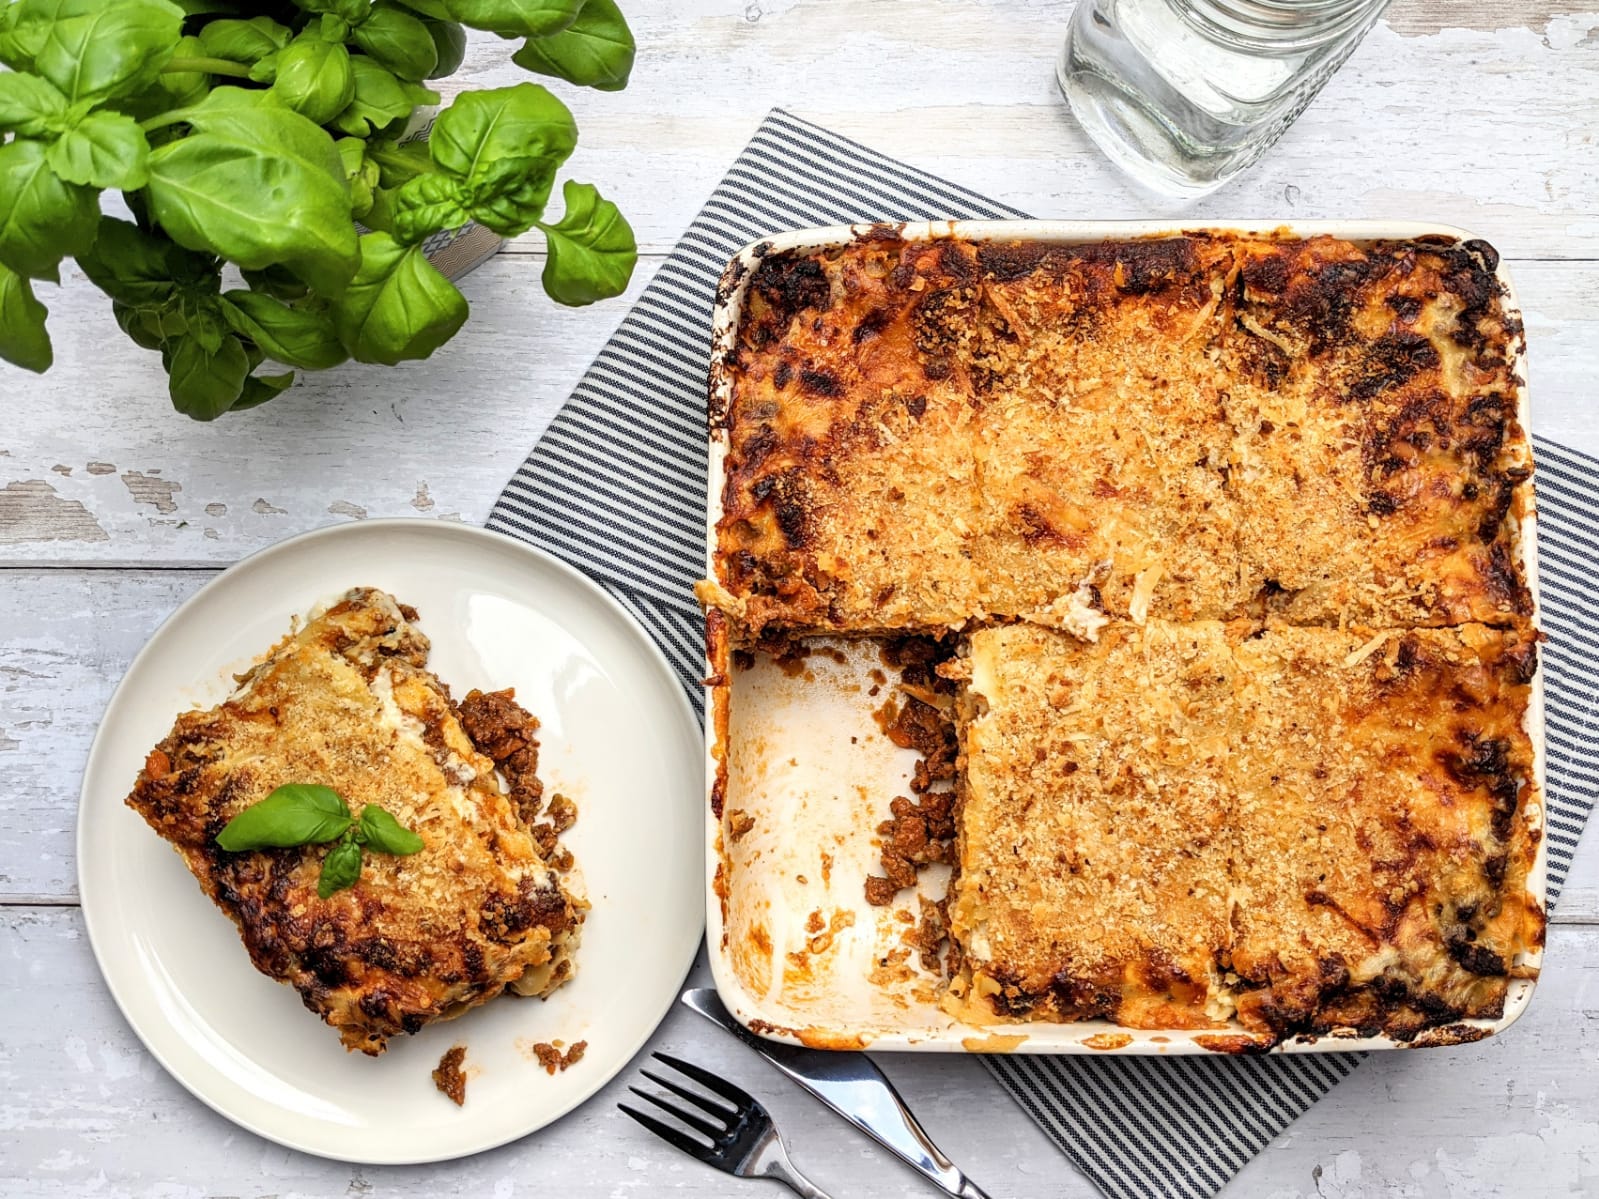
I'm really excited because this week I get to talk about one of my favourite meals to make – a Lasagne. It's a dish that embodies loving, warm, and heartfelt home cooking. It's something you pour a bit of your heart and soul into to feed your friends and loved ones. Plus with the Autumn chill growing and the nights getting longer (don’t even mention the chaos of going into another lockdown!) I think we could all do with a piping hot, rich, immensely comforting slice for dinner.
But you can't talk about a luscious Lasagne without talking about a robust Ragu which forms its delicious core. As such, today's newsletter is not just about my favourite way to make a Lasagne, it's also my favourite way to make a rich, meaty and hearty Ragu (not to be confused with a Bolognese) which you can make separately to have with pasta.
You'll also see that this is a bechamel-based Lasagne which, in my opinion, is the Beyoncé of Lasagnes. Hide your ricotta, put down the cream cheese, and don't even THINK about touching that tub of double cream or you'll get thrown into la purgatorio. Just 👏 Stop 👏 Now 👏 #SorryNotSorry #TeamBechamel
Dramatics aside, let's talk about this recipe below. I believe that there are very few truly original recipes out there because, in some way, we're all shaped by places we've grown up in and people we've learnt to cook from. And while I don't at all claim to have invented this recipe (the Ragu itself is a spin-off from a Carluccio's classic which a dear work friend recommended to me), I've made this so often and tweaked it over the years to a point where it's now simply just how I make it without ever needing to refer to a recipe.
I'm of course not saying that this is better than your current Lasagne. If you are monogamously coupled with a recipe you love, be faithful and live your best life with it – I wish you both many long and delicious years ahead. But if you're still window-shopping for a very lovely Lasagne, if you're still swiping right on potential Ragus out there, or if you're in an open relationship with your current recipe and are okay with meeting another, then I encourage you to read on.
Spill the secret sauce
You can, of course, whip up a weekday Lasagne with pre-made red and white sauces from the store in about an hour. Sure. But for me, the secret to a great Lasagne is in the Ragu, and the secret of a truly transcendent Ragu is time, which is why I recommend that you reserve this recipe for weekends. If you do it on a weekday, you’ll end up having dinner at midnight (which I've definitely done before).
Instead, start this recipe on a Saturday afternoon and you’ll have it ready by dinnertime. Put on some lovely singable tunes, pour yourself a glass of wine, put on some candles, and just zen out while you get the ingredients prepped. I'm not usually a mise-en-place type of guy, but for this recipe, the more prep you do upfront, the easier your afternoon is going to be.
You could still make your Lasagne on a weekday if you made the Ragu ahead of time (it can refrigerate for over a week) and warmed it up before assembling the Lasagne. I also love freezing what I don't eat so that I've always got Lasagne ready to go whenever I'm craving it.
The Ragu also freezes nicely (I love my freezer, can you tell?) which makes having pasta for a spontaneous workday lunch super simple: all you need to do is nuke the Ragu, toss it with some cooked tagliatelle and shave on some parmesan. Chilli flakes optional – delish and super quick!
I hope you enjoy this recipe, and if you make it, don't forget to tag me in your pics at @forksandchopstix! 😍
Serves 6
Prep time: 1 hour
Oven time (for the Ragu): 3 hours
Oven time (to finish the Lasagne): 1 hour
Shopping list
Celery, 3 to 4 large sticks
Carrots, 2 large
Yellow / Brown onions, 1.5 large
Breadcrumbs, 50 grams, coarse (you can make your own by drying out stale bread on a baking tray and blitzing it in a food processor before storing them in the freezer pretty much indefinitely)
Olive oil
Pork mince, 500 grams (approx. 10% - 20% fat, if possible – sometimes I use Lamb mince instead of pork!)
Beef mince, 500 grams (approx. 10% - 20% fat, if possible)
Smoked pancetta / lardons, 100 grams, diced
Red wine, 250ml, full-bodied (like a Merlot or a Pinot Noir – the rule is, if it’s not drinkable, it’s not cookable)
Tomato puree / concentrate, 5 tablespoons
Chicken / Vegetable stock, 1 litre (use homemade stock if you can so you can control how much salt to add, but feel free to use stock cubes if you're in a pinch)
Butter, 50 grams (as above, use unsalted if you can so you can control the seasoning, but salted butter is perfectly fine as well)
Plain / All-purpose flour, 50 grams
Milk, full-fat, 1100ml
Nutmeg, a big pinch
No-boil Lasagne / Pasta sheets, 300 grams (did you know that 1 sheet = lasagna, and that 2 or more sheets = lasagne?)
Parmesan, 150 - 200 grams, grated
Salt and pepper
Andiamo!
1. Pre-heat your oven to 160 degrees Celsius.
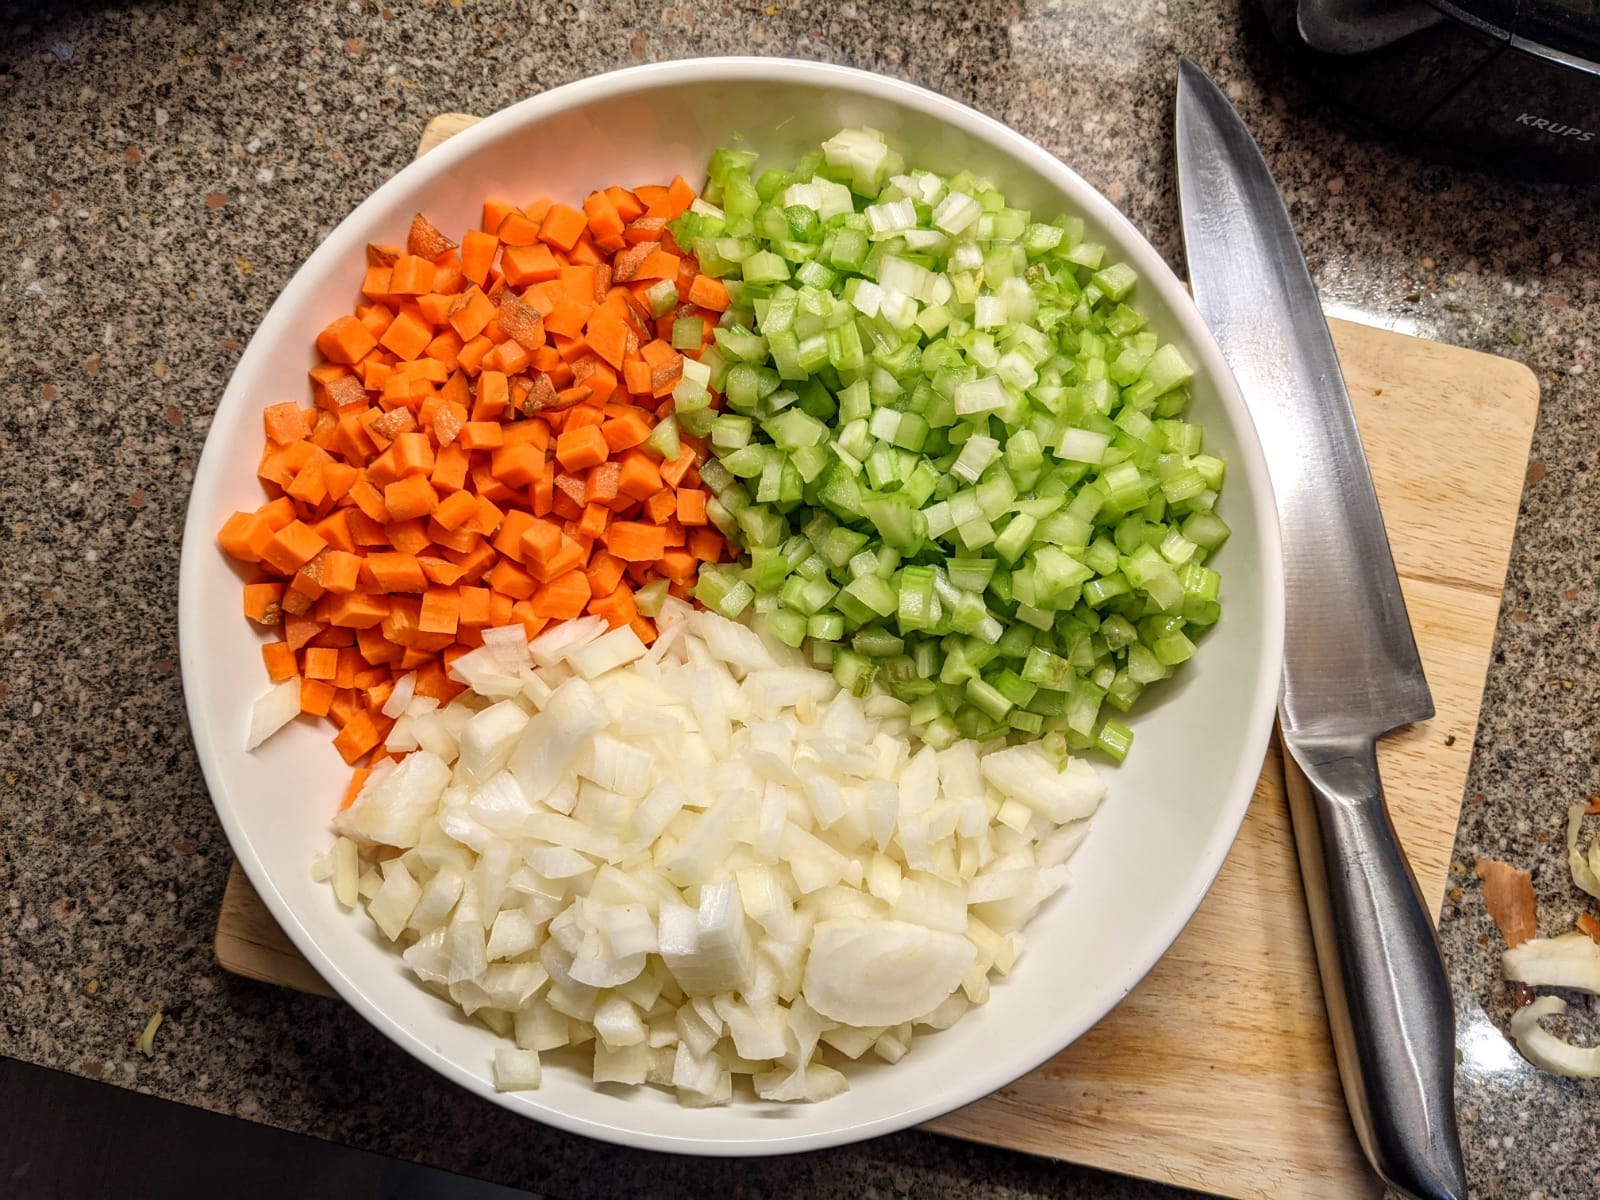
2. Make your soffritto for the Ragu. Do a small dice of the celery, carrots and yellow onions (AKA the holy trinity of Italian cooking). No need to be particularly intense or stressy about it, but it does need to be fairly uniform. And because vegetable sizes differ, just focus on getting roughly the same volume of carrots, onions and celery once everything's been diced. Chuck them all into a large bowl.
3. Toast all your breadcrumbs in a large, oven-safe casserole pot / dutch oven on medium-high heat with 1 tablespoon of olive oil – this is what you'll be cooking the entire Ragu in so make sure it's pretty sizeable. Swirl it around to coat before spreading out your breadcrumbs across the pan. Let them get golden brown and fragrant for a few minutes before taking them off the hob and transferring to a small bowl.
4. Crisp up your pancetta in the same pot, but turn the heat down to medium. The goal is to render out as much fat as possible before scooping out the pancetta to a large bowl (which will become your "meat bowl").
5. Brown your minced meats in the same pot, turning it back up to high. There’s no need to add extra oil because your mince mixture is fatty enough to cook in the pancetta grease without sticking. Do a quick mix of the pork and beef mince in a large bowl so it's roughly incorporated – don't over mix it as you don't want the meat fibres to unravel, which changes the texture of the meat. Form meatballs in your hands (slightly larger than a golf ball), squish into rough patties and add to your pot 3 or 4 at a time. You should hear a very excited sizzle. No sizzle, no dice!
Flip after 2 - 3 minutes, or whenever you get rich, dark brown caramelisation on your patties. The goal is not to cook these through, it's to get it coloured as quickly as possible for maximum depth of flavour. Once browned, add it to your meat bowl which your pancetta is already in.
Once all of your meats are nicely browned, wait for it to cool until you’re able to crumble it with your fingers, or give it a blitz in the food processor if you don't mind the extra clean up. You're aiming to get small meat pebbles, but as this will braise for 3 hours, don't stress about getting it super fine.

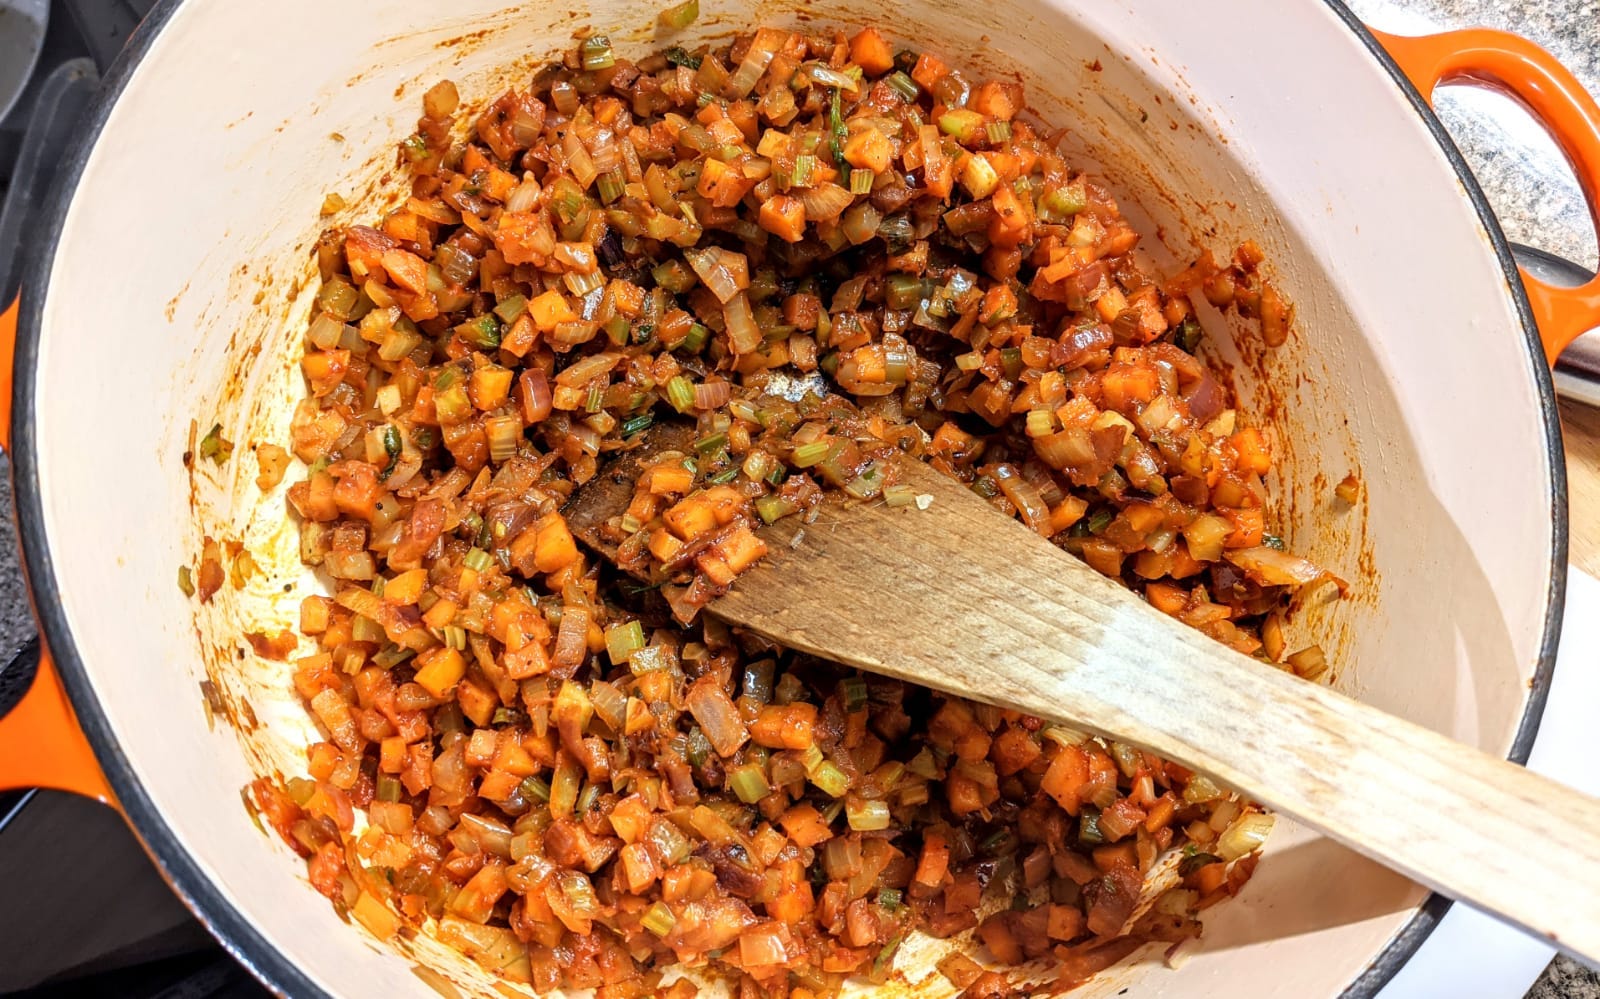
6. Start the Ragu in the rendered fat that's left in the pot, turning it down to medium. Dump in your diced celery, carrot and onions and give it a stir. As the soffritto sweats and releases its moisture, you should be able to start scraping up the brown bits on the bottom of the pan, giving everything a flavour and colour boost.
After about 5 minutes of softening, add 5 tablespoons of tomato puree and let it cook for another 5 minutes, during which the tomato puree will turn from a vibrant red to a deep brick red. Keep stirring and scraping the bottom of the pot.
Add 250ml of your red wine to the mixture (and pour yourself another glass to drink while you've got the bottle in hand – you deserve it!) Stir and let the alcohol evaporate for about 5 minutes – it should reduce slightly in the process. Pour in all of your chicken / vegetable stock and bring to a boil. Tumble your crumbled meat and pancetta into the pot and let it come up to a boil again. Season with a generous pinch of salt and pepper before putting on the lid and chucking the whole thing into the pre-heated oven for 2 hours. Stir every hour or so.
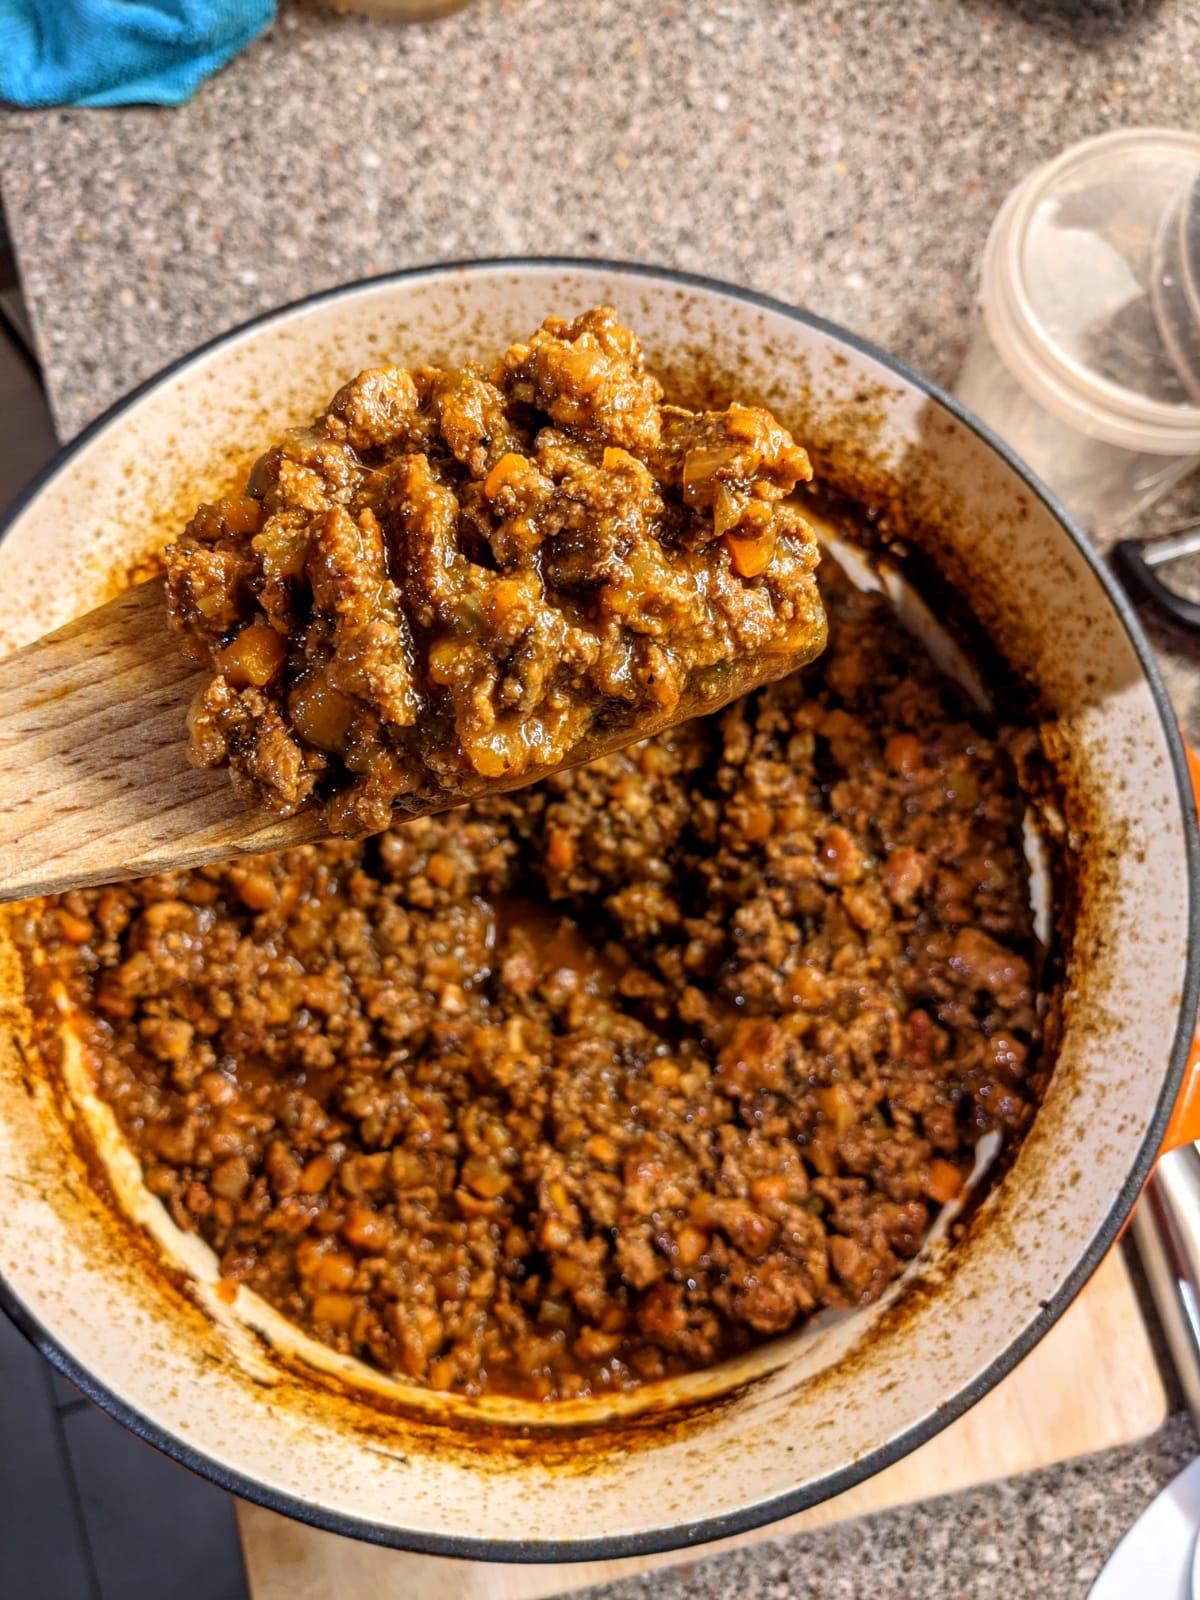
Once 2 hours are up, add in 100ml of whole milk to the pot to enrich the Ragu and round out the flavour. Stir, cover it and put it back in the oven for another hour before taking it out to rest.
Taste and season with a bit more salt if needed – it should be the tiniest bit over-salted to compensate for the relatively bland pasta sheets and bechamel. Also, add some water if it's feeling a bit dry (100ml - 200ml should do the trick). Your instincts will tell you it’s wrong, but trust me: if your Ragu looks saucy and simultaneously a bit liquidy, you’re on the right track because it needs to hydrate dry pasta sheets too! 😄
If you're making this ahead of time, let the Ragu cool completely (with the lid on so it doesn't try out) before refrigerating / freezing.
7. Make your bechamel by adding 50 grams of butter in a clean, large saucepan on medium heat. Once it's melted and fragrantly frothy, add 50 grams of plain flour to the saucepan and immediately start stirring it with a silicone whisk (so you don't ruin your pan). The flour should absorb all of the butter and become clumpy. Keep stirring for a few more minutes to cook out the flour until the mixture looks a bit like fine, wet, yellow sand.
After about two minutes, add the milk a bit at a time – all the time enthusiastically whisking the mixture. Each time you add the milk, the mixture should initially loosen before thickening up again, which will be your queue to add more milk. Repeat the process until you've stirred in a total of 1 litre of milk. It will feel suspiciously runny, but trust me when I say that if your bechamel can coat your whisk while still easily dripping right off, it's the perfect consistency. As with the Ragu, the bechamel needs to have enough moisture to hydrate and cook your pasta sheets in the oven.
Remember to add a pinch of nutmeg and lightly season the bechamel with a bit of salt as well. Turn off the heat but keep the pan on the hob so the bechamel keeps warm while you do the next step.
8. Assemble your Lasagne. Ladle in enough of the Ragu to thinly cover the base of your baking dish. Squarish / rectangular baking dishes work best (I use a 9.5" x 9.5" baking dish). Add a layer of pasta sheets – slightly overlapping them for structure, followed by enough Ragu to completely cover the pasta sheets beneath it. Spoon on enough bechamel to obscure the layer of Ragu beneath it, followed by a generous (but thin) layer of grated parmesan, before layering on more pasta sheets. You should be able to create another two more of these layers at least.
When you're just about at the top of your baking dish, spoon on a final (thin) blanket of Ragu and bechamel over your last layer (doesn't matter if the last layer is made of pasta sheets). Generously sprinkle on a generous layer of breadcrumbs, and top with a layer of freshly-grated parmesan (but not too thick), .
9. Bake your Lasagne with a loose covering of tin foil over the top for 40 - 50 minutes at 160 degrees Celcius (fan-assisted) to steam and cook the pasta sheets. Remove the tin foil and bake uncovered at 180 degrees Celcius for another 20 - 30 minutes or until gorgeously golden brown and bubbly.
10. Let your Lasagne rest for at least 15 minutes (which is more important than people realise) so your Lasagne can set and keep its shape while being sliced into 6 very healthy portions. Serve with a side of garlic bread, salad or chips – which, I’m told, is apparently a Northern delicacy – you do you!

There you go, my favourite Lasagne and Ragu recipe, which I hope will become firm favourites of yours too. And when you make this recipe, please don’t forget to leave a comment or tag me @forksandchopstix if you enjoyed it.
Happy cooking and see you for another issue of Forks & Chopstix in a couple of weeks!
x Mark
Looking for more recipes to check out, why not these?
Singapore Chicken Curry with Rice or Noodles
Mushroom Shawarma Pitas with Turmeric Yoghurt
Vietnamese Bun Cha with Beef or Tofu
Slow-Roasted Gochujang Chicken with the works
Or follow me on Instagram for more: @forksandchopstix